With the addition of subway tiles, you can easily update your kitchen or bathroom decor. And you can replace your old, worn-out tile or jazz up a blank wall without having to pay an expert in just a few days or a weekend. Because these step-by-step instructions will guide you through the procedure, you can finish this DIY project on your own.
In just eight simple stages, you’ll learn how to prepare, install, and clean up your subway tiles installation so that you end up with a stunning finished product.
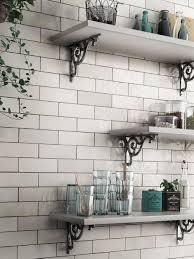
Even though there are many other backsplash designs and patterns to choose from, we decided to go with the classic offset pattern. It’s the traditional appearance of placed brick, where one row of subway tiles is half a row apart from the following row of tiles.
You may also have a look at this page for additional information about buy subway tiles. We’ll also give you some secret ideas on how to get professional-looking results on your own. Now that you’ve gained confidence in your DIY abilities, let’s get started on learning how to install this popular tile type!
What You’ll Require:
First, let’s go through the supplies you’ll need for this do-it-yourself project. A sander, an all-purpose cleaner, a screwdriver, and painter’s tape are all tools you’ll need to get started on preparing your walls for painting. The following materials will be required for your tile installation: your preferred MSI subway tile, premixed thin-set mortar, a V-notched trowel, a leveler, a wet tile saw, 1/16-inch tile spacers, and a microfiber cloth dampened with all-purpose cleaning.
A rubber float and grout in the color of your choice will be required for the grouting process on your tile. Big sponges, a large bucket, warm water, tile caulk, a caulking gun, and an applicator tool will be required to thoroughly clean and then caulk around your subway tiles.
Prepping the Walls
Preparing your walls properly is an essential step that you will not want to neglect if you want to create a professional, clean appearance in your home. Make certain that you’re working with level, smooth walls; otherwise, your rows of tile will seem uneven and unprofessional. Fill up any holes with a patching compound and smooth it down with sandpaper.
Walls should be cleaned using an all-purpose cleaner. After that, remove any outlet and switch covers you may have. Finish by marking the outside border of your tile installation around the walls, vanity, or countertop using painter’s tape.
Putting the Tile in Place
It’s not difficult to install your preferred MSI subway tiles design. Making use of your V-notch trowel, apply an even thin coating of mortar to the wall surface. To begin, scoop up the mortar using the flat side of the mortar scoop and distribute it with the notched side of the mortar scoop. Then, using a trowel, make parallel lines in the mortar on the wall by combing it together in one direction. It’s important to remember that you’ll want to apply your mortar in tiny portions, otherwise you’ll be working very quickly!

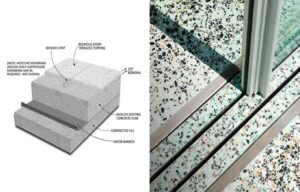
Begin by placing your subway tiles at the bottom of the wall and working your way up. Work from the bottom up, not the top down! One tile at a time, press it into the wall with your fingers. Please keep in mind that you’ll need to verify your lines with a leveler to ensure that everything is level. Cut tiles using the wet tile saw, being careful to leave enough space between them for spacers. Apply a thin coating of mortar straight onto the back of the tile if some of the places are too tiny to be reached with your trowel in certain cases. Click here to read about The Ultimate Difference Between Precast Terrazzo Flooring and Terrazzo Floor Tiles
Inserting Spacing Markers
Using two spacers for each tile side will assist you in maintaining a parallel tile installation. Make an effort to adjust the tile in order to achieve a tight fit; this will result in grout lines that are straight and even.
Waiting for the Mortar to Dry
It is essential to let your bathroom or kitchen backsplash tile to dry overnight in order for everything to set correctly. After that, you may clean up any nearby places that may have received any unwanted mortar on them before completing the work the next day!
Taking the Spacers out of the equation
Depending on how small or big your subway tiles installation is, removing the spacers may be a fast process or may take longer. After that, wipe off your tiles with a microfiber towel and all-purpose cleaner to ensure that there is no dust on the tiles.
Putting the Grout in Place
Scoop some of the white or colored premixed grout into the rubber float and use it to sweep it over the tile surface. Going over it at a 45-degree angle and then going over the same area several times in different directions can assist in getting the grout into the tiny crevices.
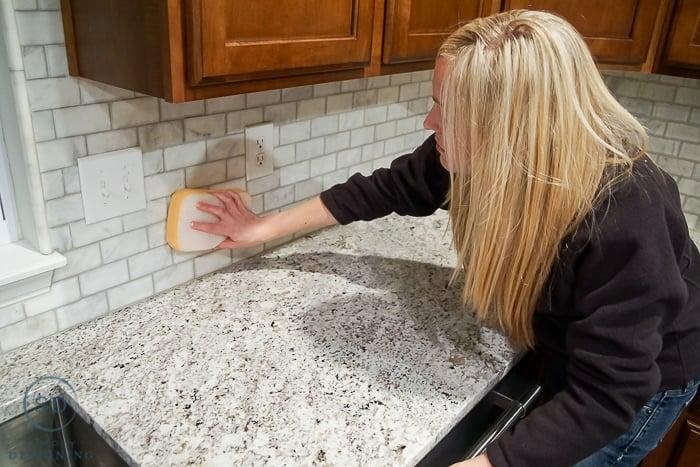
Cleaning the subway tiles
Once the grout has been applied, you should wait about one hour before washing your tile backsplash. Cleaning the grout with a big sponge and a large pail of warm water is a simple task. Rinse the sponge and repeat the process. It is important to note that it may take many attempts to completely remove all of the grout from the same location.
Applying the Caulk
The use of caulk can assist to give your backsplash a complete appearance. Before caulking, tape off any places where the tile will come into contact with the countertop, cabinets, or walls. For the best results, apply the caulk to the affected areas and then go over the lines using an applicator tool to ensure that they are completely covered. Note that you’ll want to remove the tape as soon as possible once the caulk has finished drying.
Final thoughts
With these stepwise processes, you can easily install subway tiles in your kitchen and have it look top-notch. The steps mentioned in this article are quite easily to follow and if you follow them to the latter, you should have no issues.